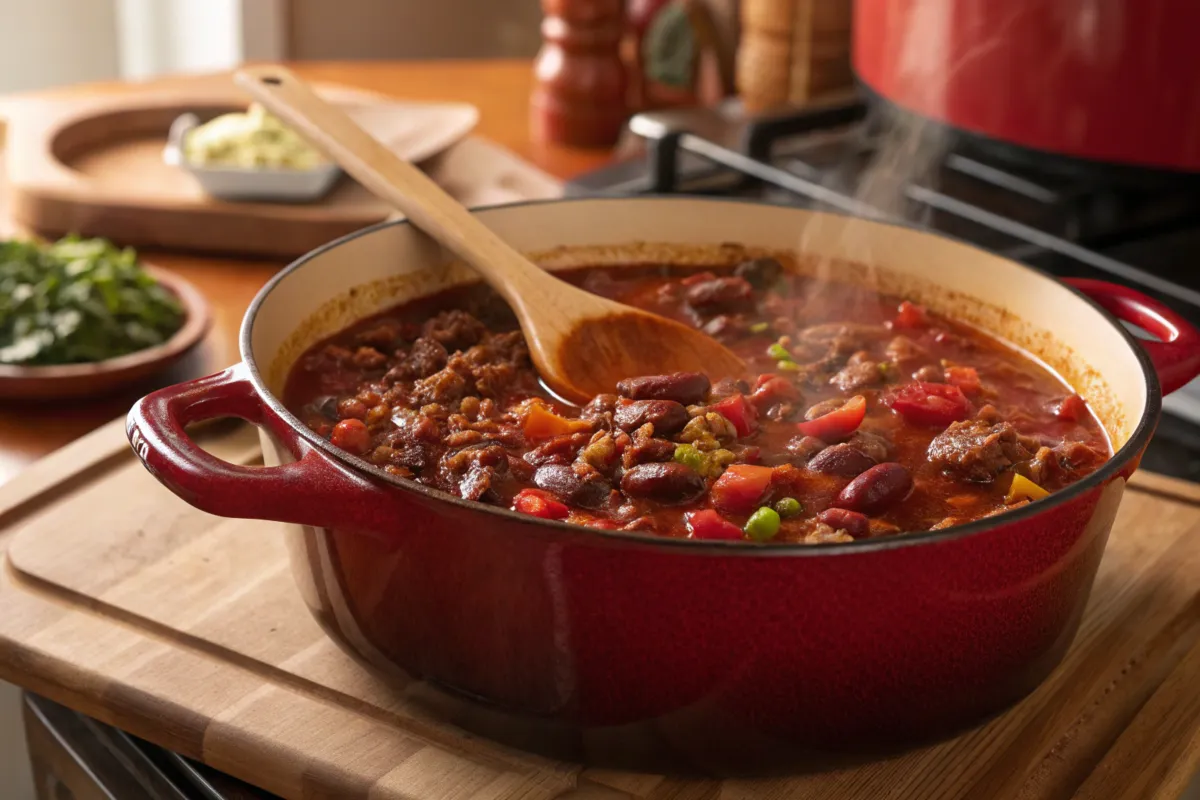
Dutch Oven Chili
Introduction to Dutch Oven Chili
If you’re looking for a hearty, rich, and comforting meal, few dishes can beat a good Dutch oven chili. Whether it’s for a chilly night or a gathering with friends and family, this dish brings warmth, flavor, and satisfaction to the table. In this article, we’ll delve into the magic of using a Dutch oven to create the ultimate chili experience. You might already be familiar with chili, but cooking it in a Dutch oven takes it to the next level, ensuring the perfect combination of flavors, texture, and richness.
So, why is the Dutch oven such an ideal cooking tool for making chili? This cast-iron pot is beloved by many chefs and home cooks alike. Known for its ability to retain and distribute heat evenly, it creates the perfect environment for slow cooking, allowing your chili’s flavors to meld together beautifully. Plus, the versatility of a Dutch oven means you can brown meat, sauté vegetables, and simmer all in one pot, minimizing mess and cleanup.
What is a Dutch Oven Chili Recipe?
A Dutch oven chili recipe is essentially a hearty stew made with a variety of flavorful ingredients like ground meat, beans, tomatoes, and a rich mix of spices, all simmered in the iconic cast-iron pot. This style of chili is ideal for long, slow cooking, allowing all the flavors to fully develop. By using a Dutch oven, you can achieve the perfect balance of heat and moisture, which is essential for tender meat and a deep, robust flavor profile.
Why Choose a Dutch Oven for Chili?
The Dutch oven is a game-changer when it comes to cooking chili. What sets it apart from other cooking methods? The answer lies in its heat retention and even cooking. Whether you’re simmering chili on the stovetop or baking it in the oven, the Dutch oven’s thick walls and lid trap heat, allowing for a consistent temperature throughout the cooking process. This means your chili will cook evenly, with all the flavors melding together for that perfect bite every time.
Additionally, Dutch ovens are incredibly durable and versatile. Unlike some other pots or pans, you can use them over high heat, in the oven, or even on a campfire. Whether you’re a beginner or an experienced cook, using a Dutch oven takes the guesswork out of the equation, giving you consistent results and less stress in the kitchen.
So, the next time you want to make chili, consider using a Dutch oven. It’s the perfect vessel for creating satisfying, flavor-packed chili, whether you’re serving it at a family dinner or preparing for a crowd.
| More in Dutch Oven |
| Dutch Oven Chicken Stew |
| Dutch Oven Campfire Potatoes |
| Dutch Oven Peach Cobbler |
| Dutch Oven Breakfast Casserole |
Ingredients for Dutch Oven Chili
When it comes to making the best Dutch oven chili, selecting the right ingredients is key. The beauty of this dish is its versatility, allowing you to tailor it to your preferences while ensuring maximum flavor and satisfaction. Here’s a breakdown of the essential ingredients you’ll need to create a hearty and rich Dutch oven chili.
Essential Ingredients for the Best Dutch Oven Chili Recipe
To begin, the foundation of a great chili lies in its meat. Whether you prefer ground beef or ground turkey, this will provide the heartiness and texture that chili is known for. The meat should be browned first to develop deep, savory flavors before moving on to the next steps. If you’re in the mood for something leaner, turkey is a great substitute, but beef is the traditional choice for that rich, meaty flavor.
Next, onions, garlic, and peppers are essential for building a strong flavor base. Onions and garlic provide the aromatics, while peppers (like bell peppers or jalapeños) offer a mild or spicy kick depending on your preference. These ingredients should be sautéed in your Dutch oven after browning the meat, allowing them to soften and release their natural sweetness.
Tomatoes are the backbone of any good chili. You’ll need canned tomatoes, either diced or crushed, to create a rich, saucy base. Combine these with canned beans—such as kidney, black, or pinto beans. The beans add texture and absorb the flavorful liquid, making the chili hearty and satisfying. Don’t forget chili powder! This spice blend is essential for that signature chili flavor, giving it a perfect balance of heat, warmth, and smokiness.
Finally, a good broth or stock (beef, chicken, or vegetable) brings everything together. It helps thicken the chili while adding depth to the flavor, giving it that satisfying richness that everyone craves. Use a high-quality broth for best results, and feel free to adjust the quantity depending on the consistency you prefer.
Optional Ingredients to Enhance Flavor
While the above ingredients will create a fantastic base, there are some optional ingredients that can elevate your Dutch oven chili to a whole new level.
- Dark chocolate, coffee, or beer: Adding a small piece of dark chocolate or a splash of coffee introduces an unexpected depth and complexity to the chili, balancing the heat and acidity. Some cooks even add a bit of beer, which not only deepens the flavor but also helps tenderize the meat.
- Different types of beans: You can switch up the beans you use depending on your taste. Kidney beans are hearty and absorb the flavors well, while black beans provide a slightly smoother texture, and pinto beans offer a more earthy flavor.
- Fresh herbs for garnish: Once your chili is done, consider garnishing it with fresh herbs like cilantro, parsley, or even a squeeze of lime. These fresh additions brighten the dish, balancing the rich, slow-cooked flavors with a touch of freshness.
By experimenting with these optional ingredients, you can take your Dutch oven chili to new heights, making it even more flavorful and unique.
Cooking Tips & Tricks
When preparing the perfect Dutch oven chili, there are a few key tips and tricks that can make all the difference. Let’s explore how you can achieve that rich, flavor-packed chili every time.
Tips for Cooking Perfect Chili in a Dutch Oven
To avoid burning your chili, it’s important to maintain a steady, low heat. The Dutch oven retains heat exceptionally well, so be mindful to stir occasionally and ensure that the chili doesn’t stick to the bottom. If you notice it bubbling too aggressively, reduce the heat and let it simmer gently. This will ensure the flavors develop evenly without the risk of scorching.
The lid of your Dutch oven is an unsung hero in chili-making. It helps trap the heat and moisture inside, creating the perfect environment for slow simmering. Don’t forget to cover your Dutch oven while the chili cooks. This is especially crucial during the first hour of simmering, as it allows the flavors to infuse deeply into the meat and beans.
When it comes to salt and spices, timing is important. Adding too much salt too early can pull moisture out of the meat and cause it to dry out. Instead, season gradually, tasting as you go. Adding your spices halfway through cooking allows them to bloom and intensify, giving your chili that irresistible aroma.
Adjusting Chili for Your Taste
One of the great things about making chili in a Dutch oven is how easily you can adjust the flavor to suit your preferences.
- How to make it spicier or milder: If you like your chili with a kick, add more jalapeños or cayenne pepper. For a milder version, reduce the heat by using fewer spicy ingredients or incorporating more tomatoes and beans to balance the heat.
- How to adjust for acidity: If your chili turns out too acidic, add a little sugar, a splash of cream, or a spoonful of tomato paste to mellow it out. Conversely, if you need more acidity, a squeeze of lime juice or a dash of vinegar will do the trick.
- Thicker or thinner chili – what’s the difference?: The consistency of your chili can be adjusted based on personal preference. If you prefer a thicker chili, let it simmer uncovered for longer to reduce the liquid. For a thinner chili, add a little extra broth or stock to reach the desired consistency.
Storing and Freezing Dutch Oven Chili
After enjoying a bowl of hearty Dutch oven chili, you’ll likely have leftovers. Here’s how to store and freeze your chili so that it’s ready to enjoy again.
Storing Leftover Dutch Oven Chili
Storing chili is easy, and it can last for a few days in the refrigerator. To store your chili, let it cool to room temperature before transferring it into an airtight container. This prevents condensation, which can lead to sogginess. Properly stored, your leftover chili will stay fresh in the fridge for up to 3-4 days.
Freezing Dutch Oven Chili for Later
Freezing chili is a great way to save a batch for later. To freeze your chili, divide it into smaller portions using airtight containers or freezer-safe bags. This makes it easier to thaw only what you need. When freezing, make sure to leave a little space at the top of each container to allow for expansion.
To reheat, simply thaw the chili in the fridge overnight and then warm it on the stove over low heat, stirring occasionally. If you’re in a hurry, you can reheat directly from frozen, but this will take a bit longer.
FAQ Section on Dutch Oven Chili
You might have a few questions about making the perfect Dutch oven chili. Let’s tackle some of the most frequently asked ones.
Frequently Asked Questions About Dutch Oven Chili recipe
Is a Dutch oven good for making chili?
Absolutely! The Dutch oven excels at distributing heat evenly, retaining moisture, and allowing for slow cooking, which is perfect for chili. It gives your dish that deep, savory richness and a perfect texture.
Is chili better in a Dutch oven or crockpot?
It depends on your needs! A Dutch oven will provide faster cooking and a deeper flavor, especially with a longer simmer. However, a crockpot is great for a more hands-off, slow-cooked version of chili.
What secret ingredient will deepen the flavor of your chili?
Many cooks swear by adding coffee, dark chocolate, or a touch of smoked paprika. These ingredients introduce complexity and depth, transforming your chili into something extraordinary.
What is the secret to making good chili?
Slow cooking over low heat, balancing the spices, and using high-quality ingredients are the keys to a flavorful and hearty chili. Don’t rush the process, and allow the flavors to meld together.
Conclusion
The Best Dutch Oven Chili Recipe for Any Occasion
Now that you know how to make delicious, flavor-packed Dutch oven chili, it’s time to gather your ingredients. The Dutch oven is perfect for creating a deep, savory chili. It helps achieve the right balance of spices, texture, and richness. So, let’s get cooking! Whether you’re making the classic version or experimenting with unique ingredients, you’re sure to impress with this hearty dish.
Remember to play around with variations, adjust the spice levels to your liking, and enjoy the process of crafting the ultimate chili. A little patience goes a long way when making the perfect Dutch oven chili!

The Ultimate Dutch Oven Chili Recipe: Hearty, Flavorful, and Easy to Make
- Total Time: 1 hour 40 minutes (minimum, can be 3 hours + for deeper flavor)
- Yield: 8-10 servings
- Diet: Gluten Free
Description
This Dutch Oven Chili recipe is a robust and flavorful meal, perfect for a cozy night in or a casual gathering. The slow simmering in a Dutch oven allows the flavors to meld beautifully, creating a rich and satisfying chili that’s packed with meat, beans, and aromatic spices. It’s a versatile dish that can be easily customized to your spice preference and favorite additions.
Ingredients
-
Meat:
-
2 lbs ground beef (80/20 blend recommended)
-
1 lb ground Italian sausage (mild or hot, your preference)
-
-
Aromatics & Base:
-
2 tablespoons olive oil
-
1 large yellow onion, chopped
-
2 green bell peppers, chopped
-
4 cloves garlic, minced
-
1 (28 oz) can crushed tomatoes
-
1 (15 oz) can tomato sauce
-
1 (15 oz) can diced tomatoes, undrained
-
1 cup beef broth
-
-
Spices & Seasoning:
-
2 tablespoons chili powder
-
1 tablespoon ground cumin
-
1 teaspoon smoked paprika
-
1 teaspoon dried oregano
-
1/2 teaspoon cayenne pepper (optional, for heat)
-
1 teaspoon salt (adjust to taste)
-
1/2 teaspoon black pepper
-
-
Beans:
-
1 (15 oz) can kidney beans, drained and rinsed
-
1 (15 oz) can black beans, drained and rinsed
-
1 (15 oz) can pinto beans, drained and rinsed (optional)
-
-
Optional Add-ins:
-
1 jalapeño pepper, seeded and minced
-
2 tablespoons tomato paste
-
1 tablespoon brown sugar (for balancing flavors)
-
1/4 cup chopped fresh cilantro, for garnish
-
Sour cream or shredded cheese, for serving
-
Instructions
-
Brown the Meats: Heat olive oil in a large Dutch oven over medium-high heat. Add ground beef and Italian sausage. Cook, breaking up the meat with a spoon, until browned. Drain off any excess grease.
-
Sauté Vegetables: Add chopped onions and green bell peppers to the Dutch oven. Cook until softened, about 5-7 minutes. Add garlic and cook for another minute until fragrant.
-
Add Tomatoes and Broth: Stir in crushed tomatoes, tomato sauce, diced tomatoes (undrained), and beef broth. Bring to a simmer.
-
Add Spices: Add chili powder, cumin, smoked paprika, oregano, cayenne pepper (if using), salt, and black pepper. Stir well to combine.
-
Add Beans and Other Ingredients: Add kidney beans, black beans, pinto beans (if using), jalapeño (if using), tomato paste, and brown sugar (if using). Stir to incorporate.
-
Simmer: Reduce heat to low, cover, and simmer for at least 1 hour, or up to 2-3 hours for deeper flavor. Stir occasionally. If you wish to thicken the chili, remove the cover during the last 30 minutes of simmering.
-
Adjust Seasoning: Taste and adjust salt and pepper, or other seasonings, to your preference.
-
Serve: Ladle the chili into bowls and garnish with fresh cilantro, sour cream, shredded cheese, or your preferred toppings.
Notes
-
The longer the chili simmers, the more developed the flavors will become.
-
Adjust the amount of cayenne pepper to your heat preference. You can add more or less depending on how spicy you want your chili.
-
For a thicker chili, simmer uncovered for the last 30 minutes of cook time.
-
To make it spicier, add some chipotle peppers in adobo sauce or a dash of hot sauce.
-
If you don’t have a Dutch oven, a large, heavy-bottomed pot will work too.
-
Feel free to add other vegetables like chopped carrots or celery.
-
For a sweeter chili, add a touch more brown sugar or maple syrup.
- Prep Time: 25 minutes
- Cook Time: 1 hour 15 minutes (minimum, can simmer longer)
- Category: Main Course
- Method: Dutch Oven/Stovetop
- Cuisine: American
Nutrition
- Serving Size: 1.5 cups
- Calories: 550
- Sugar: 8g
- Sodium: 900mg
- Fat: 30g
- Saturated Fat: 12g
- Unsaturated Fat: 18g
- Trans Fat: 0g
- Carbohydrates: 40g
- Fiber: 10g
- Protein: 35g
- Cholesterol: 150mg
Keywords: dutch oven chili, chili recipe, beef chili, hearty chili, easy chili, one-pot meal

