
introduction
How to Make Chex Mix Not Soggy?: The Ultimate Guide to Crispy Perfection
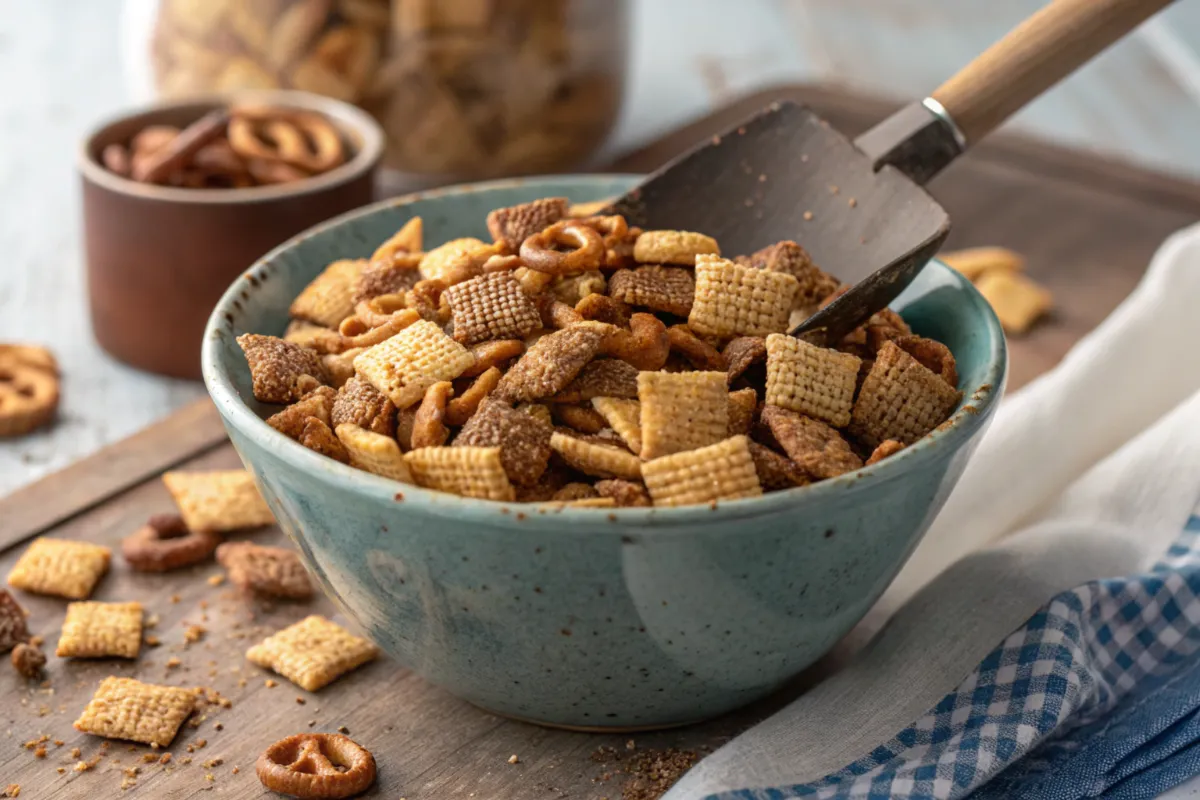
Chex Mix, that beloved combination of cereals, nuts, and pretzels, has a special place in many of our hearts and homes, especially during gatherings and holidays. Indeed, it’s a staple for parties, game nights, or even just a cozy evening in. However, this popular snack often faces a common enemy: sogginess. It’s frustrating to work hard to make homemade Chex mix, only to have it turn soft and disappointing. Fortunately, the key to avoiding that dreaded soggy texture isn’t magic; it’s all about understanding the process.
This guide is your go-to resource for mastering the art of crispy Chex Mix. Here, you will discover expert tips and techniques designed to help you achieve consistently crunchy results. We’re going to break down why Chex Mix gets soggy in the first place, from sneaky moisture to improper handling and coating methods.
Furthermore, we’ll cover essential preparation steps, like selecting the right Chex cereals and the best mix-ins, as well as offer insights on baking methods. After that, we’ll discuss crucial seasoning techniques and the best ways to cool and store your mix to ensure it stays crisp for days. Ultimately, this article will empower you to bid farewell to soggy Chex Mix and hello to perfectly crunchy snack-time bliss. We will start by taking a look at why it gets soggy, so, let’s move on.
Why Does Chex Mix Get Soggy? Key Culprits to Identify
Sogginess in Chex Mix is usually not a mystery; it stems from a few specific issues. Primarily, excess moisture is the number one culprit. Indeed, moisture wreaks havoc on that much-desired crispy texture, transforming your Chex Mix into a less-than-ideal, soft, and mushy mess.
-
Excess Moisture:
-
Moisture, whether it comes from the cooking process or the environment, is the biggest enemy of crispness in Chex Mix. You see, once the ingredients absorb too much moisture, they lose their rigidity and start to turn soggy. This is especially true when the Chex Mix isn’t properly dried and cooled after baking.
-
The moisture created during the cooking process, if not released, can easily make the mix soft. Moreover, condensation can also contribute to the problem. When you leave your Chex Mix to cool in a closed container or on a plate that traps heat, moisture will inevitably form, leading to that unwelcome sogginess.
-
-
Ingredient Moisture:
-
The ingredients themselves can also contribute to soggy Chex Mix. For instance, using butter or margarine can introduce a fair amount of moisture, which needs to be cooked out effectively. In addition to that, even seemingly dry ingredients like nuts, if not properly roasted, may have some residual moisture that could cause issues.
-
Furthermore, Worcestershire sauce, a common ingredient in many Chex Mix recipes, adds significant liquid content. Therefore, it is essential to get the balance right, ensuring that you’re not adding too much of these wet ingredients. Using too much will definitely make your homemade Chex mix soggy.
-
-
Improper Coating Techniques:
-
The method you use to coat your Chex Mix can also contribute to sogginess. When the coating isn’t evenly distributed, certain areas may absorb more moisture than others, which results in an inconsistent texture. Also, if the coating is too heavy or includes too much liquid, it can lead to a soft, soggy texture instead of the crispy result that we crave. Thus, it’s crucial to ensure that your Chex Mix is coated just right with a good balance of dry and wet ingredients.
-
-
Storage Problems:
-
Last but not least, improper storage is a significant factor that can turn your crispy Chex Mix into a soggy disappointment. If you store the mix in an open container, or in an area with high humidity, the mix will absorb moisture from the air, thus becoming soggy. Using a container that is not airtight allows moisture to seep in, turning your hard work into a mushy disaster. Therefore, proper storage is essential for maintaining that desirable crunch.
-
How to Prep for a Crunchy Chex Mix Every Time
The secret to a reliably crispy Chex Mix isn’t just in the cooking; it actually starts with how you prepare your ingredients. Proper prep sets the stage for a texture that sings crunch. Therefore, let’s look at the key areas for preparation:
-
Selecting the Right Chex Cereals:
-
First and foremost, choosing the right type of Chex cereal is crucial for achieving the ideal Chex Mix texture. While all Chex cereals share a similar shape, they each have slightly different densities and textures. For example, rice Chex is light and airy, while corn and wheat Chex cereals tend to be a bit denser. This is important, as the type of Chex you choose will affect how it absorbs moisture during the cooking process. Also, the differences in density and texture will impact how crispy the final Chex Mix is.
-
For the best results, using a mix of rice and another type of Chex, will help you to get the ideal texture of your mix. Ultimately, selecting a balanced combination will make your mix more enjoyable.
-
-
Choosing the Right Nuts and Mix-Ins:
-
The nuts and other mix-ins can contribute to the overall texture of your Chex Mix. Hence, selecting the right ones and treating them properly is paramount. As a start, always opt for unsalted and dry roasted nuts. Unsalted nuts provide better control over the overall salt content of the mix, while dry roasting helps to reduce moisture.
-
This is crucial because raw or oil-roasted nuts could contribute excess moisture to your mix and make it soggy. Further, consider other mix-ins, like pretzels, bagel chips, or crackers. Therefore, pre-bake or lightly toast these mix-ins to remove any excess moisture. In this way, these additions will maintain their crisp texture and will enhance the overall crunch of your Chex Mix.
-
-
The Right Fats: Butter vs Oil:
-
When it comes to adding fats to your Chex Mix, the debate often boils down to butter versus oil. Indeed, both have their own advantages and disadvantages, and the choice will affect the final texture. Butter, while flavorful, contains water, which can cause sogginess if not cooked properly and can burn at high temperatures.
-
On the other hand, oil, particularly a neutral-flavored one like canola or vegetable oil, doesn’t have any water and is a great choice for crispy Chex Mix. Therefore, if you want to use butter, you should use less than what the recipe indicates and cook the mix longer so that the moisture is cooked out, and if using oil, use just a tiny bit, to make sure the mix doesn’t get soggy. Ultimately, both options will work, but it all comes down to the approach and making sure you cook out the moisture.
-
Baking Methods for Perfectly Crunchy Chex Mix
The baking method you choose plays a critical role in achieving that perfect crispy Chex Mix. Therefore, let’s delve into the different approaches, starting with the tried-and-true oven method:
-
Oven Baking Techniques:
-
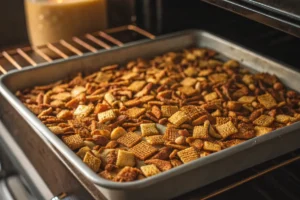
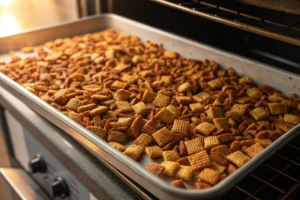
The oven is the most reliable method for achieving uniformly crispy Chex Mix. First, preheat your oven to a low temperature, usually around 250°F (120°C). This low and slow approach allows the ingredients to dry out evenly without burning. Secondly, spread the Chex Mix in a single layer on a large baking sheet, making sure there is no overcrowding.
-
Overcrowding will lead to uneven baking, trapping moisture and preventing the mix from getting crispy. Thirdly, bake for an extended period, about an hour, stirring the mix every 15 to 20 minutes. This stirring ensures that all sides of the mix are exposed to the heat. By doing so, you’ll be rewarded with a uniformly crisp and thoroughly baked snack.
-
Also, it’s essential to keep a close eye on the Chex Mix as it bakes, as each oven is different and cooking times may vary.
-
-
Stovetop Method (Pros and Cons):
-
The stovetop method, while faster, is more challenging when it comes to achieving a crispy Chex Mix evenly. In fact, this method is best used for small batches. If you choose the stovetop, use a large, heavy-bottomed pan or skillet. Heat the pan over low to medium heat, and add a small amount of butter or oil, and then start to add your mixture.
-
Stir the mix constantly to prevent burning and ensure that the seasoning is well distributed. Indeed, this method requires you to be diligent with your attention to ensure even cooking. However, the heat is direct, which can lead to some pieces browning faster than others and burning, if you are not careful. Therefore, the stovetop method is a more challenging way to get the crispness we crave.
-
-
Microwave Method (The Quick Fix):
-
The microwave method is generally not recommended for achieving perfectly crispy Chex Mix. However, it can be useful for a quick fix when you need a small amount of Chex Mix fast. To do so, spread the mix in a single layer on a microwave-safe plate, and cook in short bursts, about 30 seconds at a time. Stir it after each burst to ensure even cooking.
-
However, be very cautious, as microwaving can lead to uneven heating, and it is hard to control the moisture levels, which means that the Chex Mix will most likely not get very crispy and is only useful in a pinch. Furthermore, this method is generally not used if you want to achieve the perfect crisp.
-
-
Air Fryer Method (Pros and Cons):
-
An air fryer can be a convenient way to make crispy Chex Mix as well. To do so, preheat your air fryer to 250-275°F (120-135°C). Place the Chex Mix in a single layer in the air fryer basket and cook for 5-7 minutes, making sure to shake the basket halfway through the cooking process. This method is much faster than the oven and a great alternative for small batches. However, air fryers can heat inconsistently, so keep a close eye on the mix and adjust cooking time if needed.
-
-
Slow Cooker Method (Why not to use it):
-
While slow cookers are great for a number of dishes, they aren’t suitable for Chex Mix. This is because slow cookers trap moisture, which is detrimental to achieving a crispy result. Therefore, avoid using a slow cooker for Chex Mix as it will make your mix quite soggy, no matter what.
-
Achieving the Perfect Flavor and Texture
The right seasoning and coating techniques are just as important as the baking process to achieve perfectly crispy Chex Mix. A well-seasoned and coated mix provides that burst of flavor with every bite, while also contributing to that satisfying crunch.
-
How to Make the Perfect Seasoning Blend:
-
Creating a balanced and flavorful seasoning blend is key to a delicious Chex Mix. To start, you need to consider a good balance of salt, savory, and sweet elements. For the salty component, use kosher salt and make sure to add it according to your taste, as too much or too little will throw off the whole recipe.
-
Next, enhance the savory notes with ingredients like garlic powder, onion powder, and paprika. Indeed, these classic spices will definitely bring out the best in your mix. Then, add a touch of sweetness using brown sugar, or your favorite sweet ingredient. However, do not add too much as you don’t want it to overpower the other flavors. Finally, combine these ingredients to create your perfect seasoning blend. Ultimately, the key is to experiment and adjust the spices to your liking.
-
-
Proper Coating Techniques:
- Properly coating your Chex Mix ensures every piece is flavorful and evenly seasoned. Start by melting butter or warming oil in a large bowl, then gently add the mix. Gradually sprinkle the seasoning blend over the mix in batches, tossing well with a spatula or large spoon between additions. This prevents clumps and ensures even coating.
- Be sure to toss gently to avoid crushing the pieces. Proper coating is crucial to prevent unseasoned areas from becoming soggy due to uneven moisture absorption. By following these steps, you’ll create a crisp, delicious snack mix.
Preventing Soggy Chex Mix Post-Baking
Even after all the effort in prepping, baking, and seasoning, the cooling and storage phases are critical for maintaining the crispiness of your Chex Mix. Improper handling at this stage can undo all your hard work.
-
Importance of Cooling Properly:
-
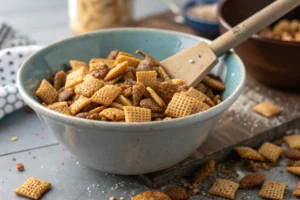
Cooling your Chex Mix properly is just as important as the baking itself. In fact, rushing this process can trap moisture and result in a soggy snack. So, after removing the Chex Mix from the oven, spread it in a single layer on a wire rack to ensure proper airflow. This way, any residual steam can escape, preventing condensation from forming.
-
Do not leave it to cool in the baking pan, since this will create a steamy environment that will make the mix soggy. Therefore, cooling it on a wire rack ensures that every piece of the Chex Mix is properly ventilated, allowing it to maintain its crisp texture. Also, make sure to give it enough time to cool completely.
-
-
How to Store Chex Mix for Maximum Crispness:
-
Proper storage is paramount for keeping your Chex Mix crispy for days. The key here is using an airtight container. This is because, an airtight container will protect your mix from humidity. Furthermore, it’s also essential to store the container in a cool, dry place, away from direct sunlight, since heat and light will soften the mix. If you live in a particularly humid climate, you may want to add a desiccant packet to your storage container.
-
This way, this will absorb excess moisture and maintain the crispy texture for a longer time. Avoid storing your Chex Mix in a bag since this could cause the mix to get crushed, and won’t protect it from humidity. Ultimately, taking these steps will ensure that your Chex Mix remains crispy and enjoyable for as long as it lasts, if it lasts at all.
-
-
Troubleshooting:
-
What if you follow all the instructions but your Chex Mix still turns out slightly soggy? Well, don’t worry, you can salvage it. In this case, return the Chex Mix to the oven, and bake at a low temperature (around 225°F/110°C) for about 15 to 20 minutes, and then let it cool completely. You can also use an air fryer to crisp up the mix for 3-5 minutes at 275°F (135°C). Furthermore, ensure that the mix has completely cooled down before storing it. This step is key for making your Chex Mix crispy again.
-
Beyond the Basics: Exploring Chex Mix Variations
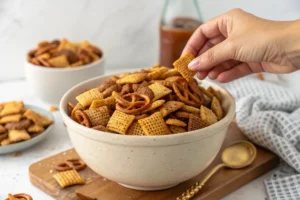
Once you’ve mastered the basic crispy Chex Mix, it’s time to get creative and explore the endless possibilities of flavor combinations. Indeed, the beauty of Chex Mix is that it can be easily customized to suit your taste preferences.
-
Sweet Chex Mix Recipes:
-
For those with a sweet tooth, Chex Mix can be transformed into a delicious dessert-like treat. For example, you can create a decadent “Muddy Buddies” variation by coating the Chex Mix with melted chocolate and peanut butter, and dusting with powdered sugar. This is a popular option that kids and adults love.
-
Also, you can experiment by adding sweet mix-ins like mini marshmallows, chocolate chips, or dried fruits to get a sweet and crispy combination. Additionally, you can drizzle caramel or white chocolate to get that added sweetness. Ultimately, the possibilities are endless when it comes to sweet Chex Mix variations.
-
-
Spicy Chex Mix Variations:
-
If you like a bit of heat, Chex Mix can be easily transformed into a fiery snack. To do this, add hot sauce, or chili powder to your seasoning blend, This way, you will get a spicy kick. You can use a variety of hot sauces depending on the level of heat you want to achieve.
-
Furthermore, experiment with spices like cayenne pepper, or chipotle powder to add depth and complexity to the mix. Another alternative is to add some pickled jalapenos, or chili flakes. Ultimately, with the right amount of heat, you can get a truly unforgettable savory mix.
-
-
Holiday Chex Mix:
-
Chex Mix is a versatile snack that can easily be adapted for different holidays. For Christmas, add holiday-themed candies such as M&Ms and use red and green sprinkles to give your mix a festive look and taste.
-
For Thanksgiving, incorporate fall flavors like dried cranberries, chopped pecans, and a hint of cinnamon and nutmeg. Also, you can even create fun shapes, for a Halloween-themed mix. Indeed, the possibilities are endless for creating festive Chex Mix for all occasions. Ultimately, the best mix is one that is customized for the holiday at hand.
-
Common Pitfalls and How to Avoid Them
Even with the best intentions, it’s easy to make a few mistakes when preparing Chex Mix. Therefore, knowing these common pitfalls will help you avoid them and create the crispy and delicious snack you envision.
-
Overcrowding the Baking Sheet:
-
One of the most common mistakes is overcrowding the baking sheet when baking Chex Mix. In fact, when the mix is packed too tightly, heat cannot circulate evenly. This leads to some pieces being undercooked, while others are overcooked and burned.
-
Furthermore, overcrowding will also trap moisture, making the mix soggy instead of crisp. So, for best results, make sure to use a large baking sheet and spread the Chex Mix in a single layer. If you need to bake a large batch, bake it in smaller batches, using more than one sheet. Ultimately, doing so will ensure that every piece of your Chex Mix will get evenly cooked and perfectly crispy.
-
-
Not Baking Enough:
-
Another common mistake is not baking the Chex Mix for long enough. This is because if the mix isn’t thoroughly dried out, it will turn soggy quickly. Hence, it’s essential to bake the Chex Mix at a low temperature for an extended period, usually about an hour, making sure that it is completely dry. Additionally, make sure to stir the mix periodically to ensure even cooking. Ultimately, thoroughly baking your Chex Mix will help it to retain its crispness for a longer time.
-
-
Adding seasoning or coating at the wrong time:
-
Adding seasoning or coating at the wrong time can lead to uneven flavor and texture. For example, if you add the seasoning before adding the fat, it will not stick well. In addition, if you add too much seasoning too early, it may not distribute well. Therefore, always ensure that you add fat first and then your seasoning gradually, so it distributes evenly. Ultimately, following the proper coating techniques will ensure that you get the most flavorful and textured results.
-
Frequently Asked Questions About Making Crispy Chex Mix
Let’s address some of the most common questions that people have when it comes to making crispy Chex Mix. We’ve covered a lot of ground, so let’s clarify some points to ensure you are fully equipped to make the best mix ever.
-
How to make homemade Chex Mix not soggy?
-
The key to a non-soggy homemade Chex Mix lies in managing moisture at every stage of the process. This involves starting with dry ingredients, like dry roasted nuts. Secondly, using the right fats – like oil or a minimal amount of butter. Thirdly, baking at a low temperature to dry out the mix slowly. Finally, cooling on a wire rack, and storing your mix in an airtight container, in a cool dry place. Ultimately, by following these methods, you can prevent a soggy Chex Mix.
-
-
How to prevent soggy Chex Mix?
-
To prevent Chex Mix from turning soggy, focus on removing moisture at every opportunity. First, use dry ingredients and make sure they are prepped correctly. Secondly, do not use an excess of butter or oil. Thirdly, bake at a low temperature for an extended time. Lastly, cool it on a wire rack to let all the steam out. By following all of these tips, you should be able to prevent your mix from becoming soggy.
-
-
Why is my Chex Mix not crispy?
-
If your Chex Mix isn’t crispy, chances are there’s too much moisture in the mix. This could be from not drying your ingredients properly, using too much butter, or not baking it for long enough. Also, cooling it in a closed container, or not storing it correctly will make it lose its crispiness. So, go back to the tips in this article to make sure you are following the correct baking, cooling, and storing techniques.
-
-
Why do people put butter on Chex Mix?
-
Butter is a traditional ingredient in Chex Mix recipes, and it’s usually used to give the mix a richer flavor and help the seasoning stick. However, butter contains water, which can be a problem if not cooked out. Therefore, using a neutral-flavored oil is also a great option for flavor and texture. Ultimately, butter or oil is used to provide the fat that allows for flavor and seasoning to be distributed properly in a Chex Mix, but it is imperative to use them in moderation.
-
Part 10: Conclusion
Final Thoughts: Achieving the Perfect Crunch
Making perfectly crispy Chex Mix doesn’t have to be a challenge. With a little knowledge and attention to detail, you can create a batch that is crunchy, flavorful, and satisfying every single time. In summary, remember that the key is to minimize moisture at all stages, from prepping your ingredients, to baking, cooling, and finally storage.
Be mindful of the ingredients you use, and do not overcrowd your baking sheet, and use low temperatures for an extended period. Indeed, cooling your Chex Mix properly, and storing it in an airtight container will help it keep its crisp texture for days.
Ultimately, do not be afraid to experiment with different flavors, spices, and mix-ins to create your own signature Chex Mix. Now that you have all the secrets, you’re well-equipped to craft crispy, delicious Chex Mix that everyone will love. So, go ahead, start mixing and enjoy your perfectly crunchy snack-time bliss!