-
Introduction: Why Dehydrate Your Own Fruit?
How to make your own dehydrated fruit?
- Listen, making your own dehydrated fruit isn’t just a trendy kitchen project; it’s a genuinely awesome way to enjoy a healthy and delicious snack. Think about it: you get to decide exactly what goes into your food. No weird preservatives, no mountains of added sugar – just pure, concentrated fruity goodness. Furthermore, it’s a fantastic method for cutting down on food waste. Got some ripe bananas or apples that need using up? Dehydrate them! Plus, you can savor the taste of your favorite seasonal fruits long after their season has ended. In addition to all that, making homemade dried fruit is often more cost-effective than buying it pre-packaged. So, you’re not just being healthy; you’re being smart too!
-
What is Dehydrated Fruit and Why is it So Popular?
So, what exactly is dehydrated fruit? Simply put, it’s fruit that has had its moisture removed. This process not only preserves the fruit, preventing it from spoiling quickly, but it also concentrates its natural sugars, leading to a more intense flavor and a delightfully chewy texture. The popularity of dehydrated fruit has soared recently, and rightly so! It’s a super convenient snack to pack for hikes, road trips, or even just to keep in your desk drawer for those mid-afternoon cravings. Moreover, it’s a naturally sweet treat that satisfies your sweet tooth without the guilt. Yep, it’s a win-win!
-
Is Making Dehydrated Fruit at Home Easy?
You might be thinking, “Okay, this sounds great, but is making dehydrated fruit at home actually doable?” The answer is a resounding YES! Honestly, it’s surprisingly simple. The basic idea is to slice your fruit, arrange it, and then gently remove the moisture over a period of hours. We’ll explore different methods, but the core process remains straightforward. You don’t need to be a culinary wizard to pull this off. Whether you have a fancy food dehydrator, a regular oven, or even an air fryer with a dehydrate function, you’ve got options!
-
What You’ll Learn in This Guide
In this comprehensive guide, we’re going to cover absolutely everything you need to know about making your own homemade dehydrated fruit. From selecting the best fruit for dehydrating to mastering the art of storage, we’ve got you covered. You’ll discover the essential equipment, learn foolproof preparation techniques, and get insider tips and tricks to achieve perfectly dehydrated fruit every single time. Furthermore, we’ll tackle common issues and answer all your burning questions. Consider this your ultimate roadmap to becoming a dehydrated fruit pro!
-
Essential Equipment for Dehydrating Fruit
Alright, before we dive into the fruity fun, let’s talk about the essential equipment for dehydrating fruit. While the basic principle is simple, having the right tools can make the process smoother and yield better results. Luckily, you probably already have some of what you need!
-
The Food Dehydrator: Your Best Friend for Dehydrating Fruit
If you’re serious about dehydrating fruit, a dedicated food dehydrator is truly your best friend. These handy appliances are specifically designed for this purpose, offering precise temperature control and consistent even airflow. This ensures that your fruit dries uniformly, reducing the risk of some pieces being under-dried or over-dried. There are two main types: horizontal flow dehydrators, where the fan is at the back, promoting even drying across all trays, and vertical flow dehydrators, where the fan is at the base or top. When choosing a dehydrator, consider the capacity you need, the temperature range it offers, and whether it has a timer function.
-
Using Your Oven to Dehydrate Fruit: A Viable Alternative
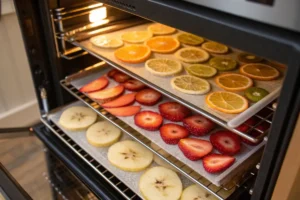
Don’t have a dehydrator? No problem! Your trusty oven can also be used to dehydrate fruit, making it a really viable alternative. The key here is to use the lowest temperature setting your oven offers, typically around 170-200°F (77-93°C). You’ll also need to create some air circulation. Prop the oven door slightly ajar using a wooden spoon to allow moisture to escape. To ensure even drying in an oven, it’s crucial to arrange your fruit in a single layer on baking sheets and rotate the sheets periodically. Keep a close eye on your fruit, as ovens can be less consistent than dedicated dehydrators.
-
Can You Dehydrate Fruit in an Air Fryer? Exploring the Possibilities
Yep, you heard that right! If you own an air fryer, especially one with a dedicated dehydration setting, you can absolutely use it to dehydrate fruit. Air fryers work by circulating hot air rapidly, which is beneficial for the drying process. However, considerations for smaller batches are important here, as air fryers typically have a smaller capacity than ovens or dehydrators. The potential advantages include faster drying times for smaller quantities. Just be sure to monitor the temperature and doneness carefully, as air fryers can be quite powerful.
-
Other Helpful Tools and Supplies
Besides the main drying equipment, a few other tools will make your dehydrated fruit journey easier. A good set of sharp knives or a mandoline are essential for slicing your fruit evenly. You’ll also need cutting boards and mixing bowls. To prevent sticking, parchment paper or silicone mats can be helpful, especially when using an oven. Finally, having some lemon juice or ascorbic acid on hand is a smart move for preventing browning in certain fruits.
-
Choosing the Best Fruit for Dehydration
Listen up, folks, the secret to truly amazing dehydrated fruit starts way before you even turn on your dehydrator. It all begins with choosing the best fruit. Think about it: you can’t make a silk purse out of a sow’s ear, right? Same goes for fruit! You want to select fruit that’s ripe but still firm. Overripe fruit might be too mushy and won’t hold its shape well during dehydration. On the other hand, underripe fruit might lack the sweetness you’re looking for. So, aim for that perfect sweet spot in between!
-
The Sweet Sixteen: Top Fruits for Dehydrating Success
Okay, let’s get specific. While you can dehydrate pretty much any fruit, some just lend themselves to the process better than others. Here’s a rundown of some of the top fruits for dehydrating success:
-
Apples: Crisp apples like Fuji or Gala work wonderfully. Core them and slice them thinly.
-
Bananas: Slightly ripe bananas are ideal. Slice them into rounds or lengthwise.
-
Strawberries: Hull them and slice them in half or quarters, depending on size.
-
Mangoes: Their tropical sweetness concentrates beautifully. Peel and slice them thinly.
-
Pineapples: Remove the core and slice into rings or chunks.
-
Oranges & Other Citrus: Slice thinly and consider removing some of the pith if desired.
-
Berries (Blueberries, Raspberries): Smaller berries can be dehydrated whole; larger ones, halve them.
-
Peaches & Nectarines: Remove the pit and slice thinly.
-
Pears: Similar to apples, core and slice them thinly.
-
Kiwis: Peel them and slice into rounds – they look so pretty!
-
Cherries: Pit them and halve them for easier drying.
-
Plums & Prunes: Halve and pit them – you’re on your way to homemade prunes!
-
Figs: Slice them or leave smaller ones whole.
-
Apricots: Halve and pit them – their tangy sweetness intensifies.
-
Cantaloupe & Honeydew: Slice thinly and remove the seeds.
-
Watermelon: Yes, even watermelon! Remove the rind and slice thinly.
-
-
Preparing Your Fruit: A Step-by-Step Guide
Alright, you’ve got your gorgeous fruit – now what? Preparing your fruit correctly is key to getting that perfect dehydrated fruit. First things first, give your fruit a good rinse under cool water to remove any dirt or debris. Then, dry it thoroughly. Next up is dealing with any blemishes or bruised spots – just cut those out. Now for the slicing! Aim for a consistent thickness, ideally around 1/8 to 1/4 inch. This is super important for uniform drying. If your slices are all different thicknesses, some will dry faster than others. A mandoline slicer can be a real game-changer here for achieving that consistency.
-
To Peel or Not to Peel? Considerations for Different Fruits
Ah, the age-old question: to peel or not to peel? When it comes to dehydrating fruit, there are definitely considerations for different fruits. For fruits like apples and peaches, leaving the peel on adds extra fiber and nutrients, plus it can look pretty. However, some people find the peel becomes a bit tougher after dehydration. For other fruits like mangoes and kiwis, you’ll definitely want to remove the peel. Ultimately, it comes down to personal preference. Experiment and see what you like best!
-
Preventing Browning: Essential Pre-treatment Techniques
Nobody wants dehydrated fruit that looks dull and brown, right? That’s where preventing browning comes in. This is an essential pre-treatment technique for certain fruits, especially lighter-colored ones like apples, pears, and bananas. The browning is caused by oxidation. The most common method is a lemon juice bath. Simply mix a bit of lemon juice with water and soak your fruit slices for a few minutes. Alternatively, you can use an ascorbic acid solution (Vitamin C powder mixed with water) or even a quick dip in pineapple juice. These treatments help to preserve the vibrant color of your fruit.
-
Setting Up Your Dehydrator or Oven
Okay, the fruit is prepped and ready to go! Now, let’s talk about setting up your dehydrator or oven. If you’re using a dehydrator, make sure it’s clean and the trays are in place. For the oven method, you’ll need baking sheets lined with parchment paper or silicone mats. Make sure your oven racks are positioned so that the baking sheets have good airflow around them.
-
Arranging Fruit on Trays for Optimal Airflow
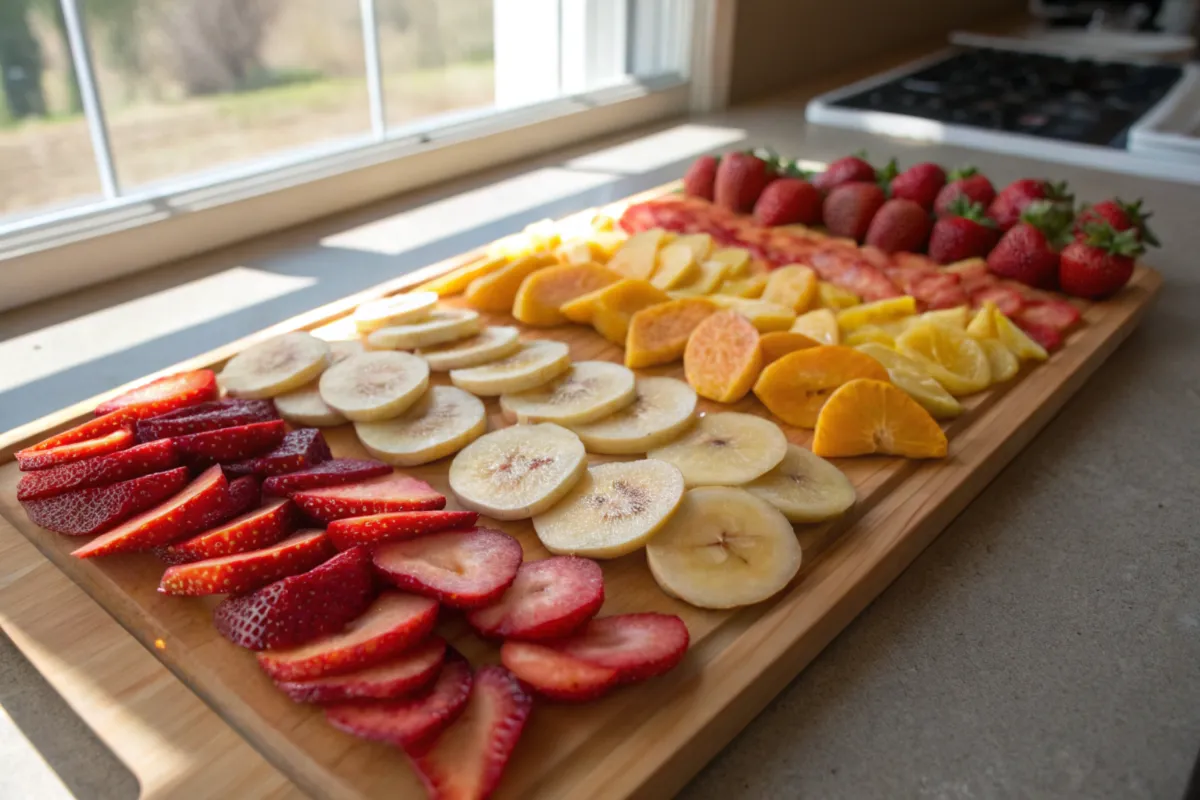
This step is crucial for getting that perfectly dehydrated fruit. You want to arrange the fruit on the trays in a single layer, making sure the pieces aren’t touching. This allows for optimal airflow around each slice, which is essential for even drying. Avoiding overcrowding the trays is key here. If the fruit is packed too tightly, the air won’t circulate properly, and your drying time will increase, potentially leading to unevenly dried fruit. Tips for maximizing space include cutting fruit into smaller pieces if needed.
-
Ideal Dehydration Temperatures for Different Fruits
Temperature plays a huge role in the dehydration process. The ideal dehydration temperatures for different fruits generally range from 125°F to 140°F (52°C to 60°C). However, some fruits may benefit from slightly different temps. For instance, apples and bananas do well around 135°F (57°C), while berries might need a slightly lower temperature of 130°F (54°C). Citrus fruits can tolerate a slightly higher temperature, around 145°F (63°C). Why maintaining a consistent temperature is crucial? Because it ensures even moisture removal and prevents the fruit from cooking instead of drying.
-
Dehydration Time: A Guide for Common Fruits
Patience is a virtue when it comes to dehydrating fruit! Dehydration time varies depending on the type of fruit, its thickness, and the humidity in your environment. Here’s a guide for common fruits:
-
Apples: Expect around 6-12 hours.
-
Bananas: Usually takes 8-16 hours.
-
Strawberries: Typically 6-10 hours.
-
Mangoes: Can take 8-18 hours.
-
Other Fruits: Generally, softer, more watery fruits will take longer. Keep in mind that these are just estimated dehydration times. Factors affecting dehydration time include the fruit’s initial moisture content and even the weather!
-
-
The Importance of Monitoring and Rotating Trays
Don’t just set it and forget it! Monitoring your fruit during the dehydration process is really important. Regularly checking the fruit’s progress will help you catch any issues early on. If you’re using an oven, rotating trays for even drying is a must, as ovens often have hot spots. Even with a dehydrator, rotating trays occasionally can promote more consistent results, especially in models where the airflow isn’t perfectly even.
-
How to Tell When Your Dehydrated Fruit is Done
So, how do you know when your dehydrated fruit is perfectly done? You’re looking for a “leathery” and pliable texture. The fruit should no longer be visibly wet, and it shouldn’t feel sticky to the touch. A good way to test is to take a piece out and let it cool slightly. It should feel slightly tacky, but not moist. You can also try testing a piece by tearing it – there shouldn’t be any visible moisture beading up along the tear.
-
Dealing with Sticky Situations: Preventing Fruit from Sticking
Nobody wants their beautiful dehydrated fruit stuck to the trays! Preventing fruit from sticking is all about a few key strategies. Using parchment paper or silicone mats when using an oven is a great way to avoid sticking. Also, ensuring proper drying is crucial. Fruit that’s still slightly moist is more likely to stick. Finally, avoiding overcrowding the trays helps with airflow and reduces stickiness.
-
Proper Storage Techniques for Long-Lasting Dehydrated Fruit
You’ve put in the effort, now you want to make sure your homemade dehydrated fruit lasts! Proper storage techniques are absolutely essential for achieving long-lasting dehydrated fruit. If you don’t store it correctly, moisture can creep back in, leading to mold or a less-than-ideal texture.
-
Cooling is Key: Letting Your Fruit Cool Completely
Seriously, don’t skip this step! Letting your fruit cool completely before storing is super important. Warm fruit can create condensation inside your storage container, which introduces moisture – the enemy of dehydrated fruit! This prevents condensation and mold growth, ensuring your hard work doesn’t go to waste.
-
Ideal Storage Containers: Keeping Moisture Out
When it comes to ideal storage containers, think airtight! Glass jars with tight-fitting lids are an excellent choice. Vacuum-sealed bags are another fantastic option as they remove almost all the air. The importance of removing as much air as possible cannot be overstated, as air contains moisture. For extra protection, especially for long-term storage, consider using oxygen absorbers.
-
Where to Store Your Dehydrated Fruit: Location Matters
Where you store your dehydrated fruit matters just as much as how you store it! Cool, dark, and dry places are best. Think pantry shelves away from the oven or a cool, dry basement. Avoiding direct sunlight and humidity is crucial. For even longer storage, you can keep your dehydrated fruit in the refrigerator or freezer.
-
How Long Does Dehydrated Fruit Last? Understanding Shelf Life
So, how long will your delicious creations actually last? General estimates for shelf life are several months to a year, if stored properly. However, factors affecting shelf life include the type of fruit and the storage conditions. Keep an eye out for signs of spoilage, such as mold or an off smell. If in doubt, toss it out!
-
Troubleshooting Common Dehydrated Fruit Problems
Even with the best intentions, sometimes things don’t go exactly as planned. Let’s tackle some common dehydrated fruit problems.
-
My Fruit is Still Sticky After Dehydration: What Went Wrong?
Uh oh, my fruit is still sticky after dehydration! Possible causes include insufficient drying time or high humidity in your environment. Solutions? Pop it back in the dehydrator or oven for a bit longer. Make sure there’s good airflow.
-
My Dehydrated Fruit is Too Hard: How to Prevent Over-Drying?
Dang, rock-solid fruit! My dehydrated fruit is too hard! This usually happens due to too high temperature or excessive drying time. Next time, try lowering the temperature and check for doneness more frequently.
-
Mold on My Dehydrated Fruit: Prevention is Key
The dreaded mold! Mold on my dehydrated fruit is usually a sign of inadequate drying or improper storage. Prevention tips? Ensure your fruit is thoroughly dried and store it in airtight containers in a cool, dry place.
-
Unleashing the Potential of Your Dehydrated Fruit
Okay, so you’ve got a stash of beautifully dehydrated fruit. While it’s fantastic for snacking straight out of the jar, there are tons of other uses beyond just a snack. Let’s get creative and unleash the potential of your dehydrated fruit!
-
Dehydrated Fruit in Recipes: Adding Flavor and Texture
Dehydrated fruit can be a fantastic addition to various recipes, adding both intense flavor and texture. Think about stirring it into your morning granola or trail mix for a burst of sweetness and chewiness. It’s also brilliant in baked goods like muffins, scones, and cookies. Try adding chopped dehydrated apples and cinnamon to your next batch of oatmeal cookies. Furthermore, you can toss it into your oatmeal or yogurt for a naturally sweet and chewy topping. Don’t forget about salads! Cranberries and dehydrated mangoes can add a surprising pop of flavor. And here’s a pro tip: you can rehydrate your dehydrated fruit in warm water or juice to use in compotes and sauces.
-
Making Fruit Leather: A Fun and Healthy Treat
Ever tried fruit leather? It’s a fantastic way to use your dehydrated fruit, especially if you have some slightly less-than-perfect pieces. Making fruit leather is a surprisingly simple and healthy treat. Just rehydrate your dehydrated fruit with a little water until it’s soft, then blend it into a smooth puree. You can add a touch of honey or spices if you like. Spread the puree thinly onto a lined baking sheet or dehydrator tray and dehydrate until it’s no longer sticky. Cut it into strips and enjoy! It’s a fun snack for kids and adults alike.
-
Frequently Asked Questions (FAQs)
Got some lingering questions about making dehydrated fruit? You’re not alone! Here are some frequently asked questions to clear things up.
-
What fruit is best for dehydrating?
Wondering what fruit is best for dehydrating? While many fruits work well, some popular choices include apples, bananas, mangoes, and strawberries. These fruits hold their shape well and their flavors concentrate beautifully during the dehydration process.
-
Do you need to soak fruit before dehydrating?
Do you need to soak fruit before dehydrating? Not typically for preservation purposes. However, a brief soak in a lemon juice solution or ascorbic acid solution is often recommended for lighter-colored fruits like apples and pears to prevent browning during the drying process. This pre-treatment helps maintain their vibrant color.
-
What is the healthiest dried fruit?
Curious about what is the healthiest dried fruit? The healthiest options are generally those that are dried without added sugar or preservatives. When you make your own dehydrated fruit at home, you have complete control over the ingredients, making it a naturally healthy snack choice.
-
Conclusion: The Simple Joy of Homemade Dehydrated Fruit
Well, there you have it! You’ve journeyed through the wonderful world of homemade dehydrated fruit. Hopefully, you now understand the simple joy and satisfaction that comes from transforming fresh fruit into these delicious and long-lasting treats. We’ve covered everything from choosing your fruit and setting up your equipment to mastering the dehydration process and storing your creations. Don’t be afraid to experiment with different types of fruit and get creative with your snacking and recipes. So go ahead, embrace the goodness of homemade dehydrated fruit, and enjoy the fruits of your labor!


